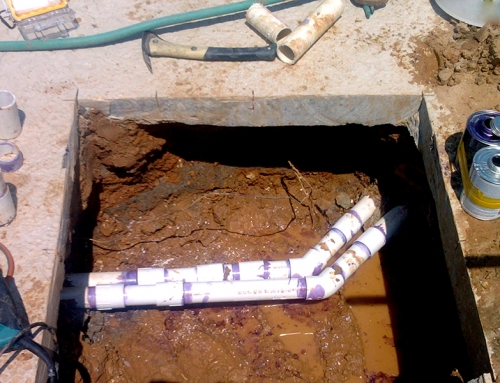
A lot of online blogs talk about having to dig to repair underground plumbing lines. Some even re-print information stating that an underground pipe isn’t possibly a reason for water loss in a pool. don’t believe it. If the pipe is connected to the pool and water is dropping, it can very easily be escaping from a crack or hole in the pipe. You can repair leaking pipes without digging … if they meet a certain criteria. Isolate The Pipe You’re Repairing and test for pressure loss.
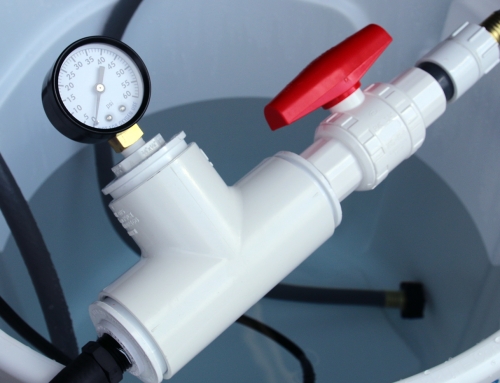
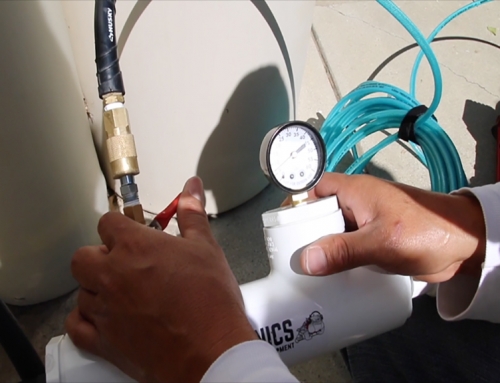
Before getting out the sledgehammer, take a little time to get a fix on what the situation is. begin by isolating the line and pressure testing it. What this means is, both sides of the pipe you are testing are accessible, and on one side, you’re blocking water from flowing out of it. Literally, plug it. From the other side of the line, use a Pressure Rig to apply just 8-12 pounds of water pressure and see if the needle on the pressure gauge drops. If it drops, the pipe is leaking out pressure, so essentially, it’s got a leak and you’re losing water.
If the pressure drop is 5 pounds or less over the course of just 30 seconds, you’ve got a prime candidate for repairing the pipe using PipeFuze! When using a coagulant, understand that big leaks will simply flow out the other end of the pipe and won’t have a chance to adhere to the inside of the crack. What this means is, if the pressure drop on the pressure gauge just rapidly drops to zero right away, you’ve likely got a complete separation, or a pipe that’s snapped. No coagulant in the world can repair that. So, what we learned here is, pressure drop of 5 pounds or less over 30 seconds – use PipeFuze, rapid drop, repair by digging up the pipe and replacing it.
We need to isolate the pipe to provide a proper pressure test, but also to administer the PipeFuze liquids to make repairs. We are going to put a low pressure flow of water through the pipe and add PipeFuze liquids to that water flow. As the PipeFuze liquids pass the area of the crack, the particulate in the fluid, along with the viscous mixture of fluid proprietary to PipeFuze will begin to clog the crack or hole. Think of it like blood platelets, it rushes to the area where the leak occurs and begins to gather. The particulate is going to form a dam at the area of the leak and the viscous fluid will gather to stop the flow of water through the crack. When the water stops flowing through to the outside of the pipe, the PipeFuze liquid will begin to self harden from exposure to the dry air. On the inside of the pipe, pressure loss is stopping.
After a couple hours of circulating the Part A fluid, the crack should self seal and pressure will be holding in the pipe. To prove it’s effectiveness, we perform another low pressure test to see that the pipe is holding pressure. When we confirm that it is, we add the Part B fluid. While the viscous fluid will self harden on the dry outside of the pipe, there is still water on the inside. By adding part B, the mixture of both fluids will cause the Part A fluid to solidify inside the crack where it’s settled. This will cause a permanent seal inside the pipe and your pipe is repaired, without digging. After the pipe is repaired, evacuate the fluid in the pipe and dispose of it. The two parts in the pipe will continue to gel and thicken, we want to remove that from the pipe. After it has been flowed through, return the pool to service. The pipe will hold it’s pressure and your leak is repaired.
Note: Do not test the hold of PipeFuze by blowing 90 pounds of air pressure into the pipe. A customer did this and asked us why it didn’t hold. Adding 90 pounds of air pressure to any pipe is going to blow anything out of the pipe, including the plugs you used to isolate it and even the elbows. Don’t do stupid things. Use the equipment as intended. When PipeFuze has adhered to the crack and solidified, it is prepared to protect water loss from standard use and will serve to keep the pipe from leaking again.