You’ve established that your pool is losing water. You’ve potentially had a leak detection performed, which is the right thing to do, and your technician has informed you that your return lines are leaking. Is PipeFuze an option for non-invasive repair? This is where the importance of a pressure drop test comes in, but lets discuss some things first.
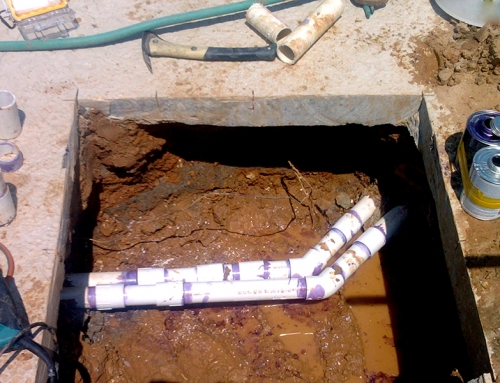
Often, when someone is aware they have a leaking pipe under a patio, the last thing they want to do is dig up the patio or break concrete to stop the leak. PipeFuze was created for this, but under the right circumstances. A leaking pipe can be something bigger than a powerful coagulant can repair. It’s important to know how much pressure is being lost in the pipe before you start, and isolation is the key to figuring this out.
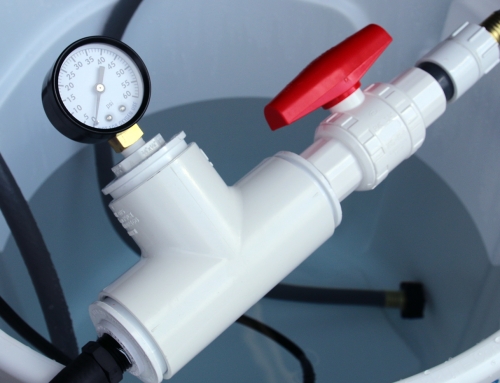
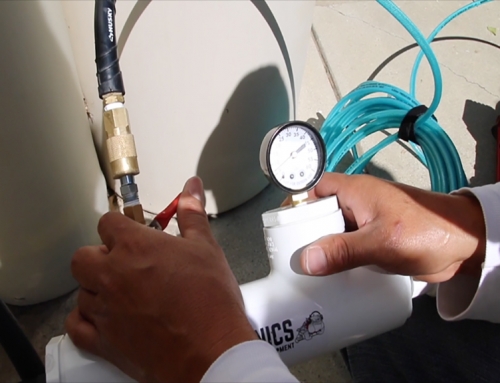
By isolating a pipe, meaning, you have access to both ends of the pipe, you can test for pressure loss. By plugging the pipe, for instance at the equipment, we can inject water pressure into the pipe with a proper pressure testing rig. Just 8 pounds of pressure is all you need. The gauge on the pressure test rig will tell you how much pressure is dropping. If you inject 8 pounds of pressure into the pipe, using water, and it drops 5 pounds or less in 30 seconds, this is the kind of break or separation that PipeFuze will work best on. If the pressure drops immediately, it’s more likely that your pipe has a full circumference break, or is completely separated. There is nothing that will fix that short of digging to the pipe and making a repair with a new segment of pipe at the break.
Leaks most often happen at elbows and couplings. Glue may fail, or the joined pipe may have shifted causing water to escape. A hole or crack may have formed. These areas are repairable from inside the pipe using PipeFuze. The scientific formula in the fluids are designed to seal those areas both outside and inside of the pipe when properly injected and they will stop water loss.
So, the importance of a pressure drop test takes effect. Know what you’re dealing with before you use PipeFuze. If your pipe meets this simple criteria, you may very well escape the cost and construction work involved to make repairs. It’s important to understand that air and water compress differently, so performing the test with water is important. Besides, the pipe is designed to transport water, not air, so it only makes sense you’ll test it’s pressure holding water.
Once you’ve confirmed that your pipe meets the criteria as described, you’ll begin the injection process of the Part A Fluid in the PipeFuze liquid set. Part A will work to stop water flow and allow the viscous fluid to begin hardening from outside of the pipe. It adheres to the inner lining of the cracked or broken area and hardens from the outside in. The water, as shown in the bucket during the set-up, will stop dropping. We recommend marking the starting level of water in the bucket and replacing it during the process to gauge how much water is still escaping the pipe. When it stops dropping, the pipe is sealed, add the Part B Fluid to the pipe and circulate it. Part B will aid in the hardening process from inside the pipe, rapidly sealing the area where Part A has started the sealing process. In a few hours, you’ll seal your leak without digging or breaking concrete.
If you own the equipment necessary to inject PipeFuze, you only need the “refill kit” fluids to do the job. For everything else, the equipment required is available in the PipeFuze shop.
For more information, or to place orders by phone, call 818-436-2953 today.